knaps jambe tufan anils sykes

abdaal.ca / projects


Welcome to the Projects page!
This page contains many of things I've worked on over the years. Click the "more" button to view the README.md file for each repository.
Right now, this page only shows GitHub repositories. Later on, I plan to make my own "GitHub" which I'll host myself, except its definitely gonna be stripped down. I really like the idea of self hosting.
Featured Project:
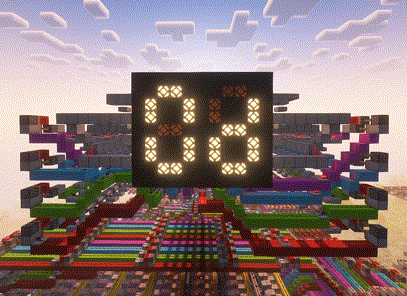
★ Minecomp - link
This was my first major step into digital design, a big one at that. The project is a fully functional CPU plus RAM, with a 7-segment display for output.
I hope to end up in digital design or something around that level of abstraction for my career.

abdaalsy/photomath-device
A standalone device that functions like a bare-bones edition of Photo Math.
Last updated: December 15, 2025 07:33 UTC
![]() "first commit"
"first commit"
photomath-device
abdaalsy/minecomp
An 8-bit computer built in Minecraft
Last updated: December 15, 2025 02:03 UTC
![]() "test commit"
"test commit"
Minecraft Computer
Hello! This repository contains the world folder, and some instructions to get you up and and running with the Minecraft computer.

Generating the fibonacci sequence in hexadecimal form until 233 (forgot to display the first two terms, significantly sped up)
Specs
Clock frequency: slow
RAM: 128 Bytes
Writing a Program
Registers
A register is simply a storage element. They are like variables, in that you can store any 8-bit value in them. This computer provides 4 registers for you to use. I gave them labels r0, r1, r2, and r3. Just try not to get mixed up between the numbers.
The Program Counter
This is a special register which stores the RAM address of the next instruction to perform. When the computer starts up, the program counter starts at 0, and increments by 3 at each fetch of the fetch-execute cycle.
The Instruction Set
The first step towards getting something running on the computer is to write the program in assembly. Later on when we actually load the program in the computer's memory, this will make it easier to pick the correct binary pattern for an instruction.
The instruction set provides 14 different instructions, many of which can optionally take in an immediate value (a value inputted literally). Here are the available choices:
Note: rb/immediate means that you can either use a register or an immediate for this operand.
SLL ra rb/immediate rc- Bit shiftrato the left byrb/immediatebits, store output inrcADD ra rb/immediate rc- Addsraandrb/immediate, stores the sum inrcSUB ra rb/immediate rc- Same thing as ADD except it subtractsXOR ra rb/immediate rc- Bitwise XOR betweenraandrb/immediate, store the result inrcOR ra rb/immediate rc- Bitwise OR betweenraandrb/immediate, store the result inrcAND ra rb/immediate rc- Bitwise AND betweenraandrb/immediate, store the result inrcSRL ra rb/immediate rc- Bit shiftrato the right byrb/immediatebits, store output inrcSTORE ra rb/immediate- Stores in the RAM address ofra, the value ofrb/immediateLOAD ra rb- Reads the value stored at the RAM address ofraintorbBEQ ra rb immediate- Addsimmediateto the program counter ifraandrbare equal, otherwise we proceed regularly. (Or in other words, branch if equal).BLT ra rb immediate- Branch if less thanBGT ra rb immediate- Branch if greater thanJMP immediate- Addsimmediateto the program counter always (it must be an immediate value).
Loading a Program
How the Computer takes in instructions
All computers fetch instructions from the memory address stored in the program counter. Instructions are too big to fit in one byte of memory, so we fetch three bytes instead.
Let's say the program counter points to address 3 in memory. - The first byte (Byte 0) stores the optional immediate operand - Byte 1 stores the register operands, and destination register - Byte 2 stores the operation to perform (ADD, SUB, etc.)
At each retrieval of an instruction, the program counter increments by 3. This is important to remember, as it means that your instructions must begin at addresses that are a multiple of 3 (3, 6, 9, etc.).
Encoding an instruction in binary
Here is a table that shows exactly what each instruction maps to in binary: | Instruction | Binary | |--------------|-------------| | SLL | 0000 0100 | | ADD | 0000 1000 | | SUB | 0000 1100 | | XOR | 0001 0000 | | OR | 0001 0100 | | AND | 0001 1000 | | SRL | 0001 1100 | | STORE | 0100 0000 | | LOAD | 0100 0100 | | BEQ | 0010 0000 | | BLT | 0010 1000 | | BGT | 0010 1100 |
You might notice JMP is not listed. That's because it only takes an immediate operand. Each instruction has a counterpart specifically to allow immediate operands, here is the table:
| Instruction | Binary |
|---|---|
| SLL_I | 1000 0100 |
| ADD_I | 1000 1000 |
| SUB_I | 1000 1100 |
| XOR_I | 1001 0000 |
| OR_I | 1001 0100 |
| AND_I | 1001 1000 |
| SRL_I | 1001 1100 |
| STORE_I | 1100 0000 |
| JMP | 1010 1100 |
Branching always takes in an immediate operand (for the offset), so it does not have a separate instruction.
Encoding operands in binary
Ok, we have our instructions, but how do we specify the operands? The byte of memory for operands uses this format: - The first two bits from the left are unused, they don't do anything. - The 2nd pair of bits (bit 5 and 4) specifies the register for the first operand - The 3rd pair of bits (bit 3 and 2) specifies the register for the second operand - The last pair of bits (bit 1 and 0) specifies the register where the output will be stored.
As an example, lets say we are adding the number stored in register 2, and register 3, and storing the result in register 1. Our byte would look like:
0010 1101
Lets say you want to perform an immediate instruction, like incrementing register 3 by 1. Our first operand would be register 3, and our last operand would be register 3 (since thats where the output will be stored), but what about the 1? Immediate values have their own separate byte remember? So we'll just store the operand there in binary.
Our operand byte will look like: 0011 0011, and our immediate byte will look like: 0000 0001
Prepare this for each instruction in your program, and then we'll cover loading it into the computer.
Writing to the Computer's Memory
First, we need to actually get you in the world in Minecraft. To do this:
1. Download the "world.7z" file in the root folder of this repository.
2. Extract it
3. Move resulting folder to .minecraft/saves. If you don't know where .minecraft is:
- Windows: C:/Users/<username>/AppData/Roaming/.minecraft.
- Mac: ~/Library/Application Support/minecraft
- Linux: ~/.minecraft
4. A folder called circuits should appear in the saves folder. If you see "world" instead, open world and drag the circuits folder out of the world folder into saves.
5. Load up the world in minecraft, it should have the name "circuits".
6. Set both your Render and Simulation distance to 24 chunks in settings.
Now that you are in the world, copy and paste this message in chat: /tp <username> -168 133 -109 147.4 12.3.
You should see this:

- The levers allow you to select an address in memory with the magenta wool being the most significant bit
- The glass wires allow you to decide what will be written to the address. (Place a redstone block on top of the redstone to power it)
- The button labelled "WRITE EN" writes the value you entered on the glass wires to the address you selected
- The button labelled "SET ALL" writes the value you entered on the glass wires to EVERY ADDRESS
When loading your program, keep the following in mind: - leave addresses 0-2 zeroed out - Instructions are always 3 bytes wide, the 1st byte is for the immediate, 2nd for the register operands, and 3rd for the actual operation (ADD, SUB, etc.). - Because instructions are 3 bytes wide, this means that they must begin at addresses that are multiples of 3 (3, 6, 9, etc.) - Flip OFF all address levers, and power off all write lines once you're done.
Also, address 127 controls the 7 segment display. Writing a value to that address automatically displays it!
Running a Program
The OFF/ON Switch
Enter this command into chat: /tp <username> -134 139 -136 -60.1 9.5. This will take you to the ON/OFF switch. After loading your program, don't flip it on yet and instead refer to the next section to start up the clock. After one whole cycle passes, flip on the switch and your program will start running.
To turn the computer off, all you need to do is flip that switch off. Memory is not affected by this, so don't worry about losing your program.
Starting the Clock
Enter this command into chat: /tp <username> -86 195 -120 91.3 76.6. You should see:

This is the clock, all computers run in cycles of: - fetch (retrieving an instruction from memory) - decode (figuring out what operation to perform, and the inputs and outputs) - execute (running and storing the result of the operation).
The clock orchestrates this, a redstone signal travels through the repeaters, and at the end of each section of repeaters, the next phase of the fetch-execute cycle is started.
Now, enter this command into chat: /tp <username> -84.4 183.6 -130.2 2.0 50.8. You should be facing a redstone dust. To start the clock, place a redstone block on top of it FOR AT LEAST 2 SECONDS and then break it.
IMPORTANT: Ensure all the address selection levers, and data input lines are off in the memory area before starting the clock.
The PAUSE Switch
We all make mistakes. To help investigate bugs in your program, I added in a pause switch. Enter this command in chat to reach it: /tp <username> -77.2 181.7 -130.2 74.2 17.2. You should see:

Flipping it on will pause the program such that it won't respond to the clock. The clock is still running though so it is up to you to unpause right where the clock left off, otherwise you might experience some undefined behaviour.
abdaalsy/visual-electric
Electrostatics visualizer meant to build intuition for students in high school and university.
Last updated: July 25, 2025 02:03 UTC
![]() "update repository"
"update repository"
Visual Electric 1.0
Made to help university and high school students build an intuition for electrodynamic/electrostatics! Enter a problem you're having trouble visualizing and learn from an intuitive animation. This tool will (hopefully) visualize problems involving:
- Coulomb's Law (1.0)
- Electric fields (?.0)
- Electric potential (?.0)
... or a mix of these.
Note that these visualizations aren't gonna be a mirror of reality, rather an approximation. Accelerations will probably be assumed to be constant, dependent on the values derived at time=0.
Sitting here typing this at the beginning of this project, I honestly have absolutely no idea how I'm gonna make this work. There's so much open-endedness. It's really daunting, but this project is too cool to not do. Imagine how sick its gonna be once its in a working state.
README.md is empty
abdaalsy/selfieAI
Combines pictures of individual people into a selfie with all of them.
Last updated: May 04, 2025 06:26 UTC
![]() "update .gitignore"
"update .gitignore"
SelfieAI
This program generates selfies of me and my friend according to a text prompt. The output is (hopefully) close to the prompt, though this is up to the text encoder of the model I use. The base model being used is Stable Diffusion 1.5 (SD1.5), with RealisticVision fine-tuning the model for photorealistic images. Since photorealistic images is a wide category, Low Rank Adaptation (LoRA) will be used to train the model to generate pictures of me and my friend, taken in a selfie style on a typical mobile phone camera.
Plans for the Future
My original idea was an AI that could generate selfies of any two people so long as images of them were provided. But in my research I found out that training this model would require me to gather reference images of hundreds, maybe thousands of people. I don't have the capability for that so I downsized the program to just me and my friend as a proof of concept, but I do hope to implement my original idea someday. If that happens, it would be sick to get it deployed on the web, free for anyone to use. I'd use a cloud GPU to handle all the heavy processing so that any device can use SelfieAI. I have 0 experience with AI/ML, so I'm going to focus on learning about its inner working. Good thing SD1.5 is open-source cus my minimum wage job ain't paying for no subscription.